Showing posts with label printmaking. Show all posts

Friday, 27 July 2012

A lull, and then print-making

Back after a long absence!  Once my Foundation Course finished, I found myself in rather an odd state of listlessness for a week or two, not quite knowing what to do with myself, and probably also just rather tired.  It felt so odd not to have a project to work at, and deadlines to meet.  But at last I have found my energy levels again, and begun to  focus on print-making, as a precursor to starting the MA course at the end of September.  It seemed like a good idea to give myself a refresher course in simple print-making techniques, using materials to hand at home, and without recourse to any specialist equipment.  In reality, I haven't done a great deal of printing this past year, so it has felt like starting from scratch, working initially with relief prints, i.e. lino and collagraphs which I can print using relief methods.  I've been helped and inspired by several books, including ......


I have a slight problem with lino-cutting - a war-wound from too may years spent hunched over a keyboard has left me with a touch of RSI in my right wrist, and I have trouble if I put too much sustained pressure on my hand.  I've discovered that using proper lino is often too stiff and hard, and gives me a lot of pain,  but I have less trouble with the more flexible, and softer, vinyl mat which I can buy at Scrapstore Kids' Art shop in St Werburghs.  I've been using, so far, basic water-washable block printing inks, cheap and cheerful and designed for school use, also from Scrapstore.   


I began with a really simple design to get used to using the tools again.

Which printed out like this...


 I then tried cutting a relief block from card, using scraps of mount-board (also from Scrapstore) which i sit and then sealed with shellac (knotting fluid) to make them waterproof against the ink. The design was from a very simple drawing of my current favourite shoes.


The print came out like this ...
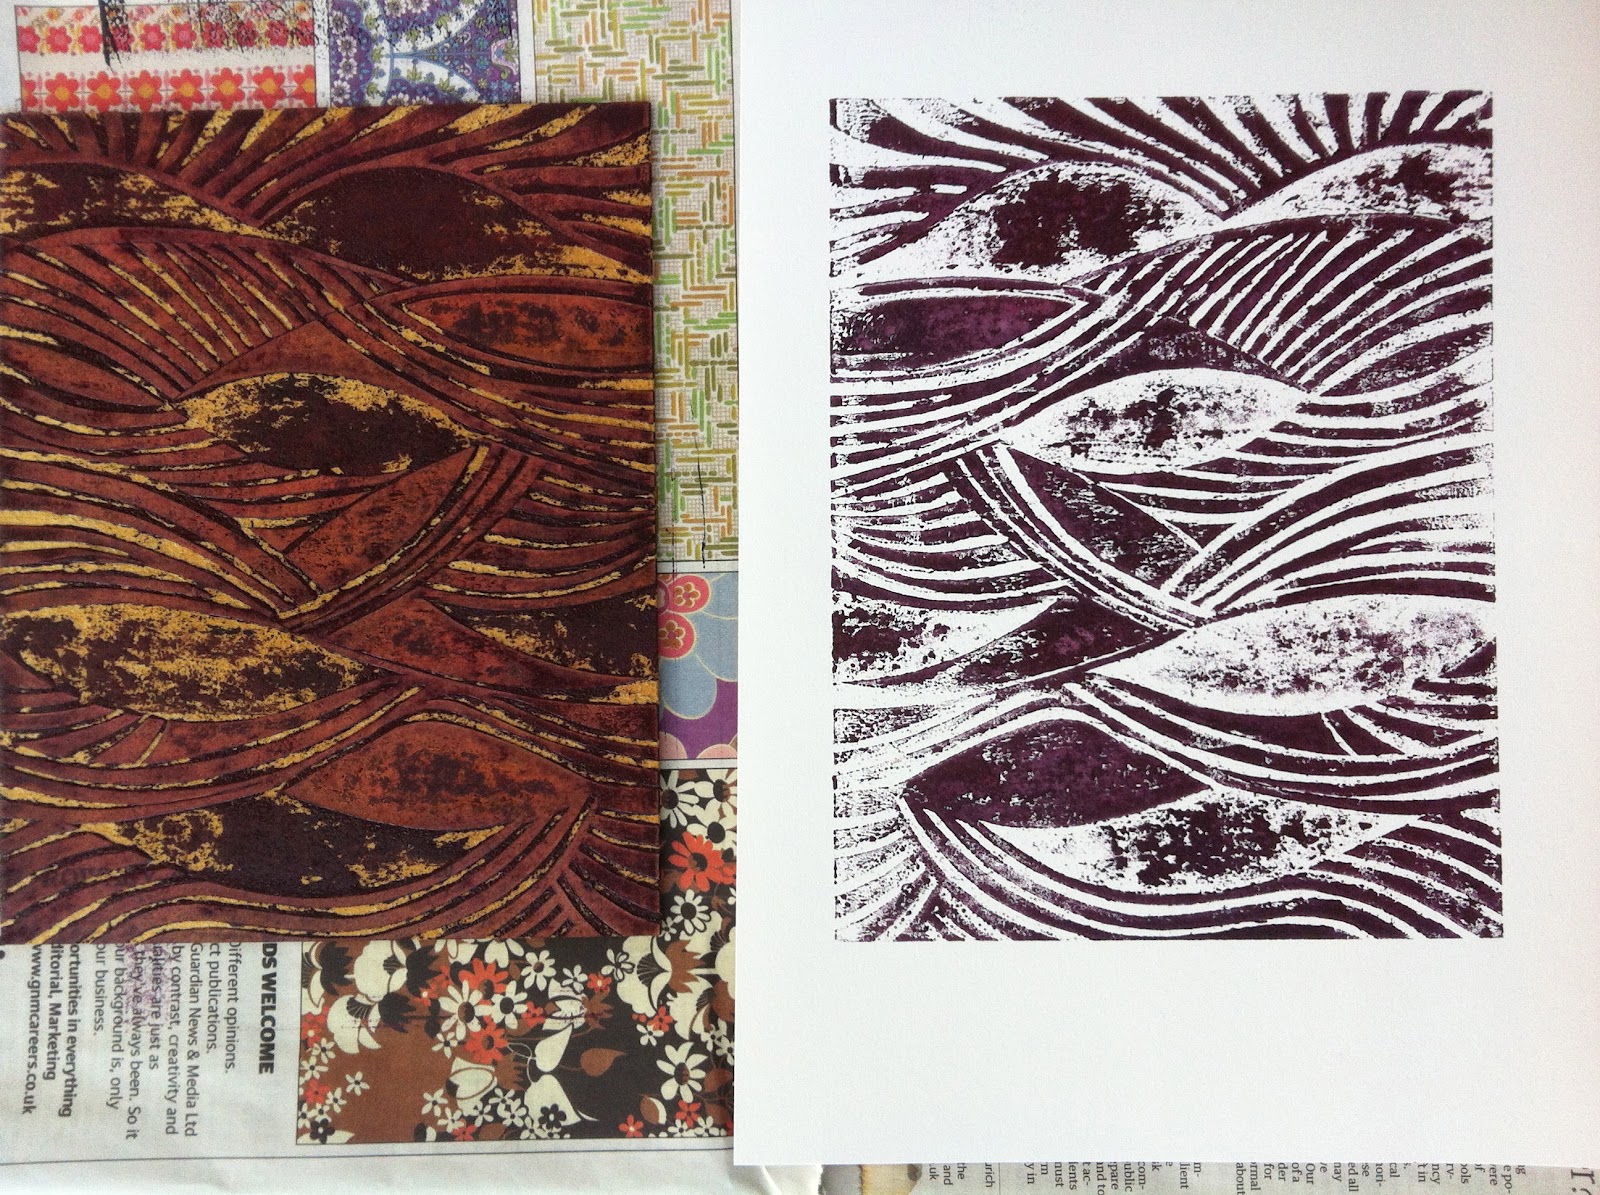
I found that cutting into mount board was a lot less trying on my wrist, and also that it would print reasonably well this way (I have previously used card as the base for collagraphs, but always using an etching press, and had not released they would work in relief mode).  So I went a little crazy, and made a whole set of small card blocks, playing around with textures, with using the peeled-off top layer as a relief on another piece of card, rough side up, and smooth side up.  I tried cutting fine lines, and also removing relatively large sections of the surface.  I wanted to create a kind of sampler of surfaces and techniques, as the basis for more considered designs later on.

All the blocks were sealed with shellac, most with two coats, one or two with more.  Again, I hoped this would help test out the best mix of cutting and sealing, for use as relief blocks.

The heatwave this week has been helpful in making sure shellac dried almost instantly, but ti was less helpful yesterday web I had a mammoth printing session.  The ink was drying much too quickly, both on the ink-slab and on the blocks.  So I added some fluid designed to delay the drying on screen printing screens, and it seemed to help.

Here are some images of my print table in use, and the blocks themselves.


I used a laundry rack from IKEA for drying the prints.  £20 - perfectly serviceable - and brilliant compared with the phenomenal price of "proper" print drying racks from specialist art suppliers, which can cost hundreds of pounds.  It worked perfectly, and folds up neatly when not in use (and could also, of course, be useful for the laundry).


More images soon of the finished prints.


I was fairly pleased with this first effort, although I think the ink was the weakest part, and it will be wroth investing quite quickly in some better quality relief inks.  I have quite a lot of fabric printing ink, so I may also try printing onto textiles with these simple blocks.


Next steps will include making a series of blocks to try two and three colour prating, which will also require proper registration and careful preparation of the design.


Thursday, 1 December 2011

Maps Project, More kinds of printing, 1st December

After my day in college doing 'poor man's etching' and collagraph prints, I wanted to explore printingg a bit more - but what with the lack of time in college, and the chaos at home because of the building work in the kitchen, i have been reed to doing things in a very basic way.  So I have only been able to make a very small attempt at relief printing, using what was available at home.

The biggest problem was that I only hd acrylic paint, and not printing ink (I have some relief printing ink, but it has been pack away and is totally impossible to relocate at present).  I discovered very quickly that you need th right kind of ink!

However, I had a go first at doing a mono print, rolling ink onto an acetate sheet, dropping paper onto that, and then tracing the lines of my walking routes round Bristol through all the layers, using a sharp pencil and working as fast as I could.

The first print was very dark - there was too much paint, and it was paint! And it wasn't printing ink!.


This was what the acetate ink plate looked like after the print was pulled.  Still rather a lot of ink!


So I managed to pull a second print from the inked acetate, which was actually a lot better.


 A second inking failed for a different reason - I drew into the print rather too heavily, and the paper (torn form a spare sketch book) stuck to the printing planet and tore a little.  Effects of the wrong kind of ink and the wrong kind of paper.


This was the acetate inked plate, with traces of torn paper stuck to the paint.


Next up, I decided to try something much simpler, a potato cut relief print.  I cut a motif derived from my 'walking routes' print design, and inked the potato using a sponge brush. The results were far from brilliant (I think I would have done better with proper printing ink) but I quite liked the design itself.


This is where I was working, on the kitchen table in the cramped chaos of the sitting room.


Inspired by this design, I cut a simple lino block, and tried printing from that.  The results were seriously marred by the lack of proper printing ink....


 I might have another go at this later with the right materials, as I quite liked the effect, and I would like to see why it looked like as a repeat pattern over a larger area.


Monday, 28 November 2011

College week 12/1 28th November, Pathway Project encore

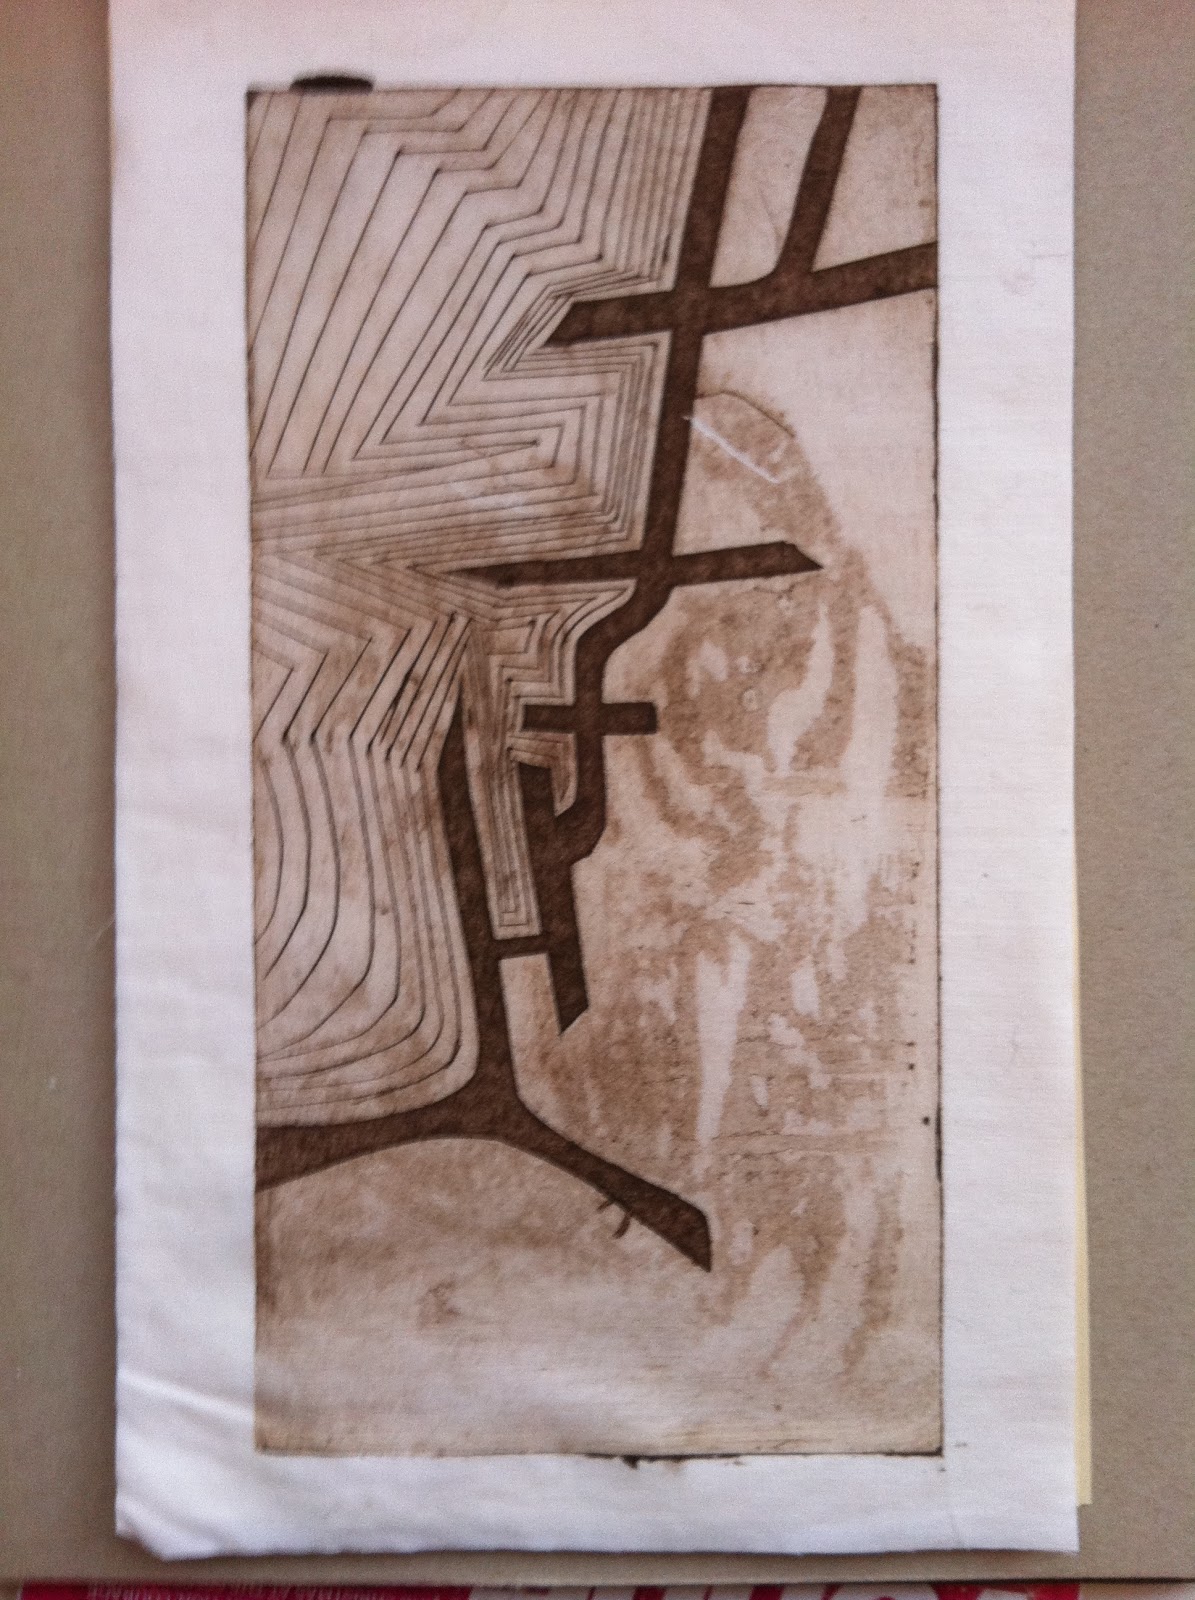
Today we had a full day on our projects.  I was at college before 10 and keen to print my 'poor man's etching' and collagraph plates.  Since last week' enthusiastic session, I have failed to find time to make any more plates, but I had three, and in the end that was plenty in terms of the time available.  I was able to experiment a little to explore the different results from various variables such as the amount of ink, the different approaches to cleaning/preparing the plates (wiping the excess ink off with scrim), the type of paper and the length of time soaked, the pressure on the press roller, et, etc, etc.


The full-timers were having assessment eosins all day so we were not able to use all the rooms.  However, the small print room was free so Mary and I had the room to ourselves.

I did several prints from each of my three plates, and the results were fairly good.  I used cream cartridge paper, soaked for about 10 minutes.  Almost all of them came out well, with crisp outlines and confident colour.  
Here are some of today's better results.


I did one with two colours, rubbing them in separately with small pieces of scrim (a la poupette) and trying to avoid the two colours mixing.  I used a vivid green and sepia brown, which colours just happened to be to hand, but the colours do not do each other favours, and although I liked the two-colour effect, these particular colours didn't really work very well together.


Note to self: from time to time, in workshops or sessions like today, I sometimes think to myself "I'm only experimenting, this doesn't really matter" and I make some rather odd prints, using
random colours, whatever paper happens to be around, whatever.  But in fact I need to remember that every print is a potentially useful outcome, and it would be better if I made better use of every attempt...e.g. in this case, a more thoughtful choice of colours would have given me a two-colour print I might want to use, rather than one I'd happily consign to the bin.


I also did a couple of prints on cotton cloth, dug out from Teresa's store by Mary, and not even ironed before printing.  I had not realised you could print onto cloth this way through the etching press. They  worked surprisingly well, and this is something I'd like to try again in future project work.


I pegged the prints up to dry, but realised they were not quite dry by the timeI wanted to collect things up to go home.  So I took them down, and layered them up with tissue paper in between each one, and then I rolled the stack of prints through the press.  When I took them out, the ink had dried but had also transferred a 'shadow' print onto the tissue paper interleaves.  These look rather good and may be useful when I come to develop the prints at home. A nice surprise!


It was good to be working on my own today, feeling fairly confident that I was doing something focussed. and other people seemed to be similar enthusiastic and positive today.

Useful tutorial session with Mark, too, which made me find various new ideas for the project, and beginning to think about Project II, following our assessment day next week.

Monday, 21 November 2011

College week 11/2 More Pathway Project 21st November

A whole day working on our Pathway Projects.

I wrote a draft project Proposal (I had done one last week on the computer but forgot to save it and it's disappeared into the electronic wasteland) which formed the basis of a discussion with Mark.

I am working on the Place/Site/Map theme,  focussing on Maps.  What is a map?  What elements of a map do I want to develop?  A map of somewhere or nowhere?  Or just the idea of a map as a (normally) two-dimensional representation of a physical place or of a complex set of information.

My chosen pathway is printmaking, possibly also fine art/making.   I have started by plotting my journeys from my house in and around the city, but I intend to leave the literal representation behind and develop  some images/objects which are derived from, but not necessary represent, the actual map.   For instance,  I have become interested in the use of contour lines as a way of drawing the topography of a map.  I could use contours in a more general way for drawing...

I'm not at all sure I've explained this well - I will have to do better in my revised Proposal!

The discussion with Mark was useful.  The key issues emerging were:

  • the proposal needs to follow the prescribed format - this seems to matter more than I had expected;
  • I need to document my research better;
  • I could take photographs of my frequent walking routes;
  • I need to be aware of the physical and technical resources available for this project (and the limited time) so that my ideas are realisable;
  • perhaps I am trying to do do too many different things?


However, I did get on with some practical work today, to add to the start I'd made at home last week.  Today I decided to cut some plates ready for 'poor man's etching' and/or collagraph printing next week.  I did three boards:

one based on my walking route to town:


 one based on the overlaid tracings of my various walking routes:


 and one derived from the idea of contours:


I gave them each two coats of shellac varnish, but they weren't dry enough to try printing today.  I hope there'll be sufficient time to do quite a lot of printing next week.


While they were drying I also did some tracings of the aggregate set of drawn-out routes.  Not quite sure what I'll do with these, but I like the idea of doing something by way of a digital print from them - or perhaps a stitched piece.  For the moment, this is what they looked like....


Thursday, 10 November 2011

Pathway Project 1/1

I've started work on my first of two Pathway Projects for Foundation this week.  From the list of 8 possible topics, I've focussed on Site/Place/Map and have been doing a lot of thinking and web-based research to get my ideas loosened up.

It's been an interesting journey already.  I'm not sure I made a conscious choice about this, but I began by focussing on the word Map.  I looked at all kinds of references to maps in art - from the old world onwards.  There is just so much out there!  Here's a random selection from among the many images I've found and liked, starting with three textiles images, firstly this by Shannon Rankin


or this by textile artist karen kamenetzky

or this by New York quilt maker Ian Hundley

Printmakers have done lots with maps, such as this by Bristol printmaker Anna Warsop (website link is here)  


Among many current artists using maps, I particularly liked the work of Susan Stockwell, whose work is very varied and original, including using printed maps to make dresses and other objects, and creating maps from unusual materials such as tea bags,  dressmakers patterns, and blank tissue paper.  More of her work here and some images here...


It's been very hard to focus.  And as I've explored the idea of 'map' i've been drawn into other aspects of the theme - Site and Place - and realised that this theme could take me almost anywhere - from site-specific installations, large and small,


through to graffiti and street art,


and onwards into landscape of all kinds,


and indeed into land art.


Too many images to choose form - more on my project folder in due course.

So how to narrow this down to something I want to do, in the space of a month-long project?

I also have to keep my chosen pathway in mind too.  Of course, I'm not entirely sure what that is - so here's a bit of a ramble about how to choose.

I have, so far, done most of my creative work in textiles - and I know I can continue to do this at home and in classes - I know how and where to get inspiration and challenge.  So it makes sense to develop pathways this year which are outside my 'usual' areas, and which take maximum advantage of the college facilities and staff.

Plus,  what are the things I might be able to continue to develop, within the limitations of working at home, after Foundation finishes?  There's no point getting all excited about enamelling, for instance, if I'm never going to have access to a kiln later on.

Adding these things together, I am drawn most to Printmaking, and  - oddly and surprisingly - to Painting.  And of course I can add stitch and textiles and ceramics and digital and photography and sculpture into this mix as the mood takes me.  But a focus on printmaking will be the starting point, and aiming to move towards printmaking in the confirmatory stage.